ZUCCHINI CHOCOLATE CHIP WALNUT BREAD
 PRINT RECIPE
Adapted from a recipe by “v monte” on allrecipes.com
I subscribe to a local company called theproducebox.com. They deliver local, farm-fresh produce to homes in the community. That said, I get lots of zucchini and had to figure a way to use them all. This zucchini recipe is awesome, especially when the kids love it – and don’t realize the green stuff is a vegetable.
Don’t drain or squeeze the water from the zucchini. This is what gives the batter the liquid it needs.
INGREDIENTS
Set 1
3 c. all-purpose flour
1 tsp. regular salt
1 tsp. baking soda
1 tsp. baking powder
1 T. ground cinnamon
Set 2
3 whole, large eggs, room temperature
1 c. vegetable oil
2 ¼ c. granulated sugar
1 T. vanilla extract
Set 3
3 c. shredded zucchini, use medium-hole grater
1 c. chopped walnuts
¾ c. semi-sweet chocolate chips
Tools: medium bowl, large bowl, electric beater, rubber spatula, strainer, 6 mini loaf pans, non-stick pan spray, half-sheet pan, toothpicks
DIRECTIONS
Preheat the oven to 325 deg. F.
1. Combine all of the dry ingredients in step 1 in a medium bowl. Stir to combine. Set aside.
2. In the large bowl, beat together the eggs, oil, sugar, and vanilla extract.
3. Sift the bowl of dry ingredients over the bowl of wet ingredients.
4. Beat the mixtures together on low, just until there is a little bit of dry ingredients still visible.
5. Add the zucchini, nuts, and chocolate chips to the mixture.
6. Use the rubber spatula to incorporate everything together very well. The zucchini adds sufficient moisture to the batter.
7. Spray the six mini loaf pans with non-stick spray.
8. Measure 1 cup of batter into each loaf pan.
9. Arrange the six pans on the half-sheet pan and bake for about 40 minutes. Check the loaves to see if they are done by pressing the top of one or two loaves. If it feels squishy, bake for another 10 minutes.
10. If the loaves feel firm at the top, stick a toothpick down the center of two loaves. If there are barely any crumbs on the toothpick, your bread is done. If the toothpick looks wet or has lots of crumbs on it, bake for another 5 minutes and check for doneness again.
11. Cool bread on wire rack for 10 minutes then remove the loaves from the pans.
12. Cool completely then wrap twice in plastic wrap.
13. Store in freezer gallon bags at room temp for a day or two, several days in the fridge, or a couple of months in the freezer.
 Return to More Recipes
Next Recipe: Coconut Pound Cake
SATISFYING YOUR GUAM RECIPE CRAVINGS SINCE 2006.
Effective March 2021, PaulaQ will begin replacing Canola and vegetable/seed oils in recipes with pure lard from Reverence Farm, coconut oil, and avocado oil.
GUAM FOODOPEDIA
LOOKING for something on Paulaq.com? Enter your keyword in the search box below:


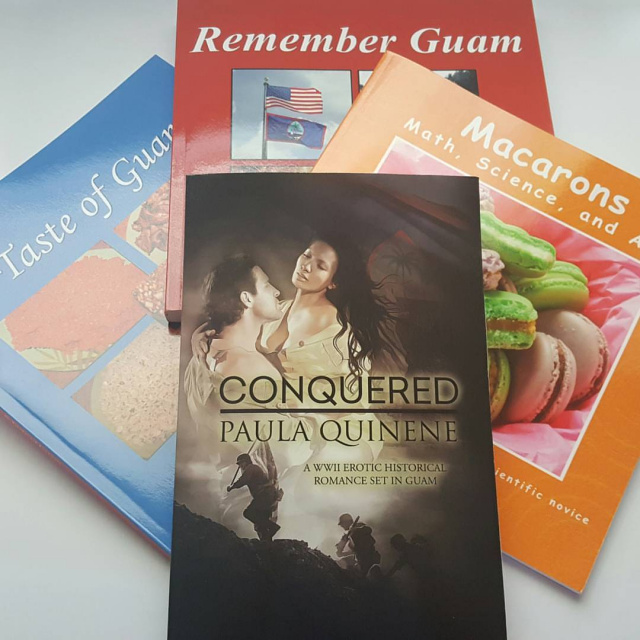
PURCHASE YOUR BOOKS TODAY


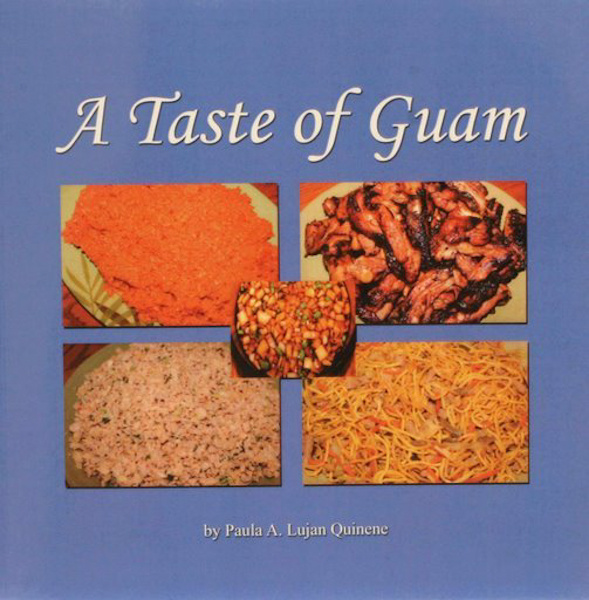
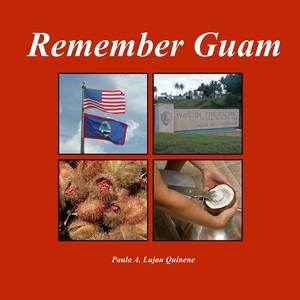

Here's Home | A Taste of Guam | Remember Guam | More Recipes | Romance Novels | Macaron Book | Visit Guam | Food History | Food Photos | The Big Green Egg | Contact Paula
© Copyright Paula Quinene. Check out Guam cookbooks and Chamorro cookbooks, A Taste of Guam and Remember Guam, for more Guamanian recipes and Chamorro recipes that are tested, tried and true. Get Macarons Math, Science, and Art, for foolproof macaron recipes and techniques. Enjoy a Guam romance novel in Conquered. Most photos courtesy Paula and Edward Quinene.


